Buckaroo Banzai: Is somebody out there not having a good time? Is somebody... crying?
Penny Pretty: Me. *sniffle* It's me.
Crowd: Boo!
Buckaroo Banzai: Hey, hey, hey, hey-now. Don't be mean; you don't have to be mean... 'cause, remember, no matter where you go, there you are.
Deep! *wink*
This mani features a fabulous polish from indie polish maker CrowsToes called Green Thumb of Doom. Green Thumb of Doom is a shimmery blue-leaning bright grassy green jelly polish packed with color changing microflakies that shift from green to gold depending upon the angle of light. The microflakies are the star of this show, giving this stunning polish fantastic chromatic depth and enormous visual appeal. They glow in dim and indirect light and light up with sparkle in the sun. Despite the name, this is a happy, sprightly polish.
Being a jelly, Green Thumb of Doom is translucent. I've seen online photos of full manicures done with this polish by itself, but those folks are nail enthusiasts of a much higher caliber than I. For my manicure, underwear was necessary. I chose a pale mint green from Julep called Susie.
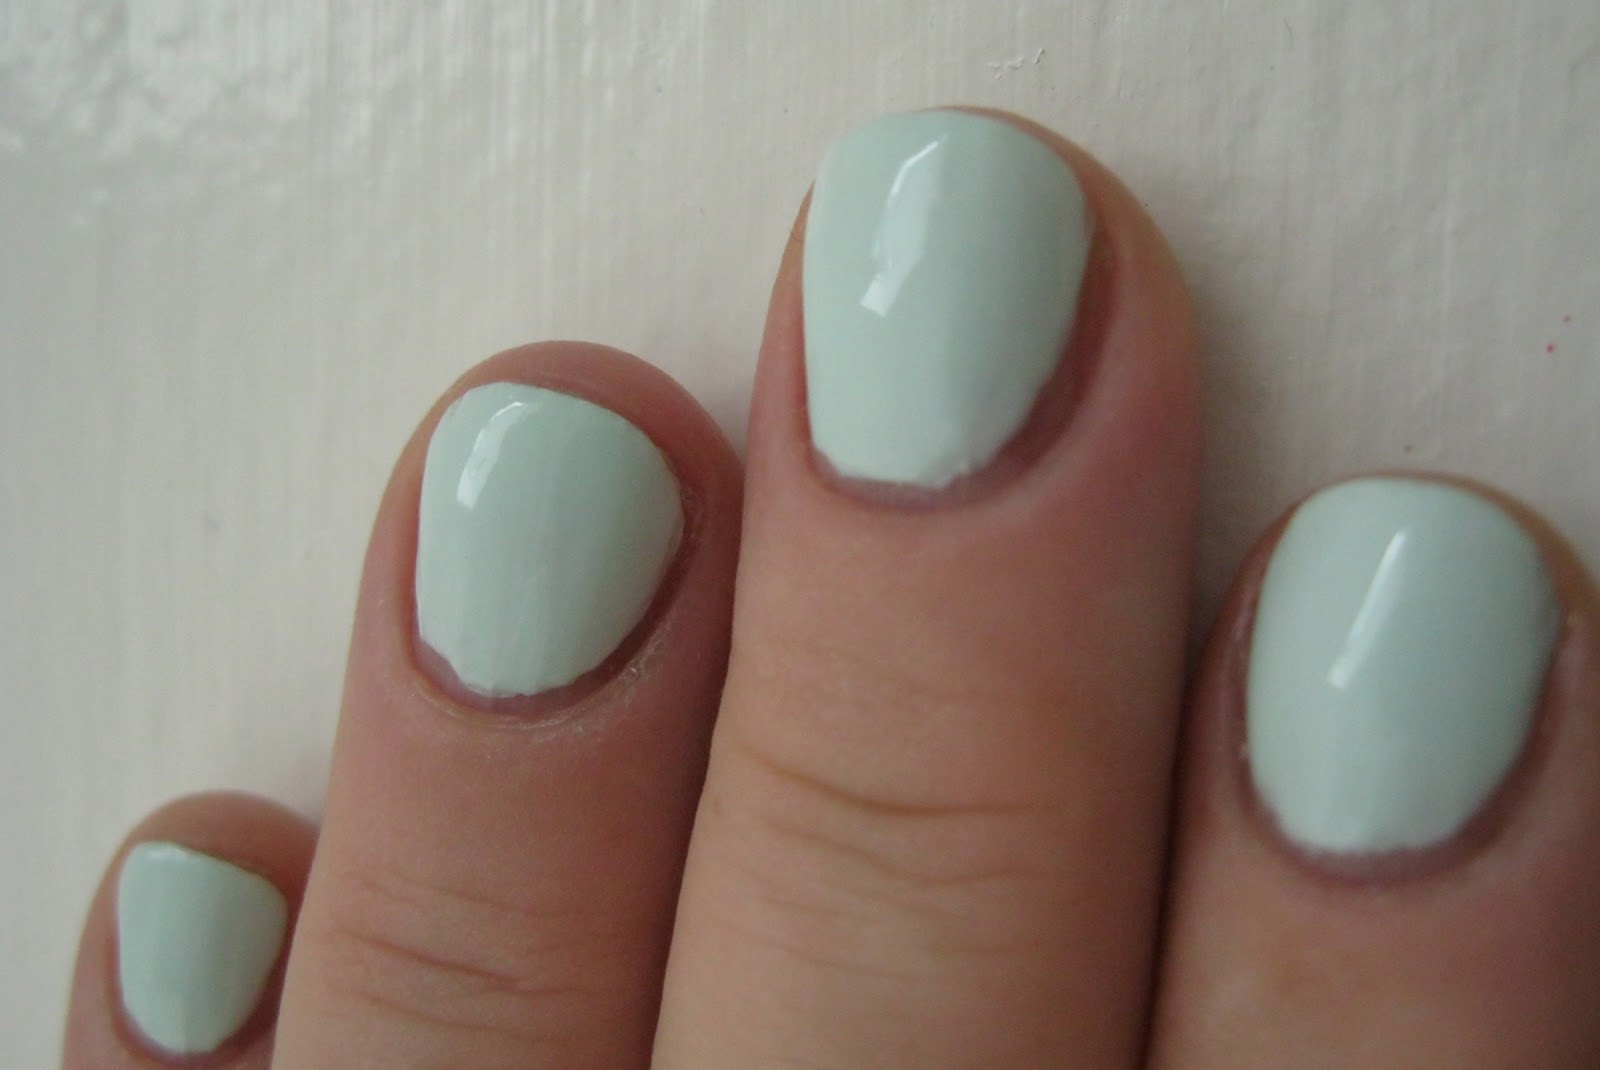
Susie is described by Julep as a "muted mint green." If whitened to the point of pastel is muted then that's accurate. Susie is the palest of pastel mints.
And it applied as pastels do, streakily. Now I wasn't deterred by this, having learned that just getting the first coat on is enough to put you well on the way to winning the battle of application. Streaks are par for the course. By the second coat, those streaks should be evening out if the polish is decently self-leveling.
Susie refused to self-level. Plus there was bubbling. Gripped by a knot of anxiety, I immediately slathered on a thick third coat. Never do that! If a polish has any tendency to bubble, it will certainly do so with a vengeance the second you start slathering.
And bubble bubble bubble it did. Like mad. Ok fine, I said. Grabbed the remover and my fabulous Graham Hands Down Ultra Nail Pads, took it all off and began again.
Seche Rebuild, then Essie First Base. Then I applied two very thin coats of Susie, taking care to let the first one dry before the second. It was streaky and AGAIN with the bubbling. I was like, OMG! In desperation I grabbed Green Thumb of Doom and quickly applied two coats. Since I was a tad put off by what was happening I got a little loose with my technique so there was swipage. MAJOR swipage. I mean there were microflakies all over the place. All in all, a hot mess. Still I kept going and slathered on a fat coat of Seche Vite over the whole thing.
And lo... something wonderful happened. No, the swipage was still there but once again the Seche Vite exerted it's magical force over the unruly polishes beneath and the manicure, the part that was on my nails, actually took form. It was still a hot mess mostly, but I could see the potential there.
I thought about it for a while. I even took some photos, which luckily for you I won't share. And then, once again, I removed it all and started over.
This time for every coat of Susie I immediately applied a coat of Poshe Super Fast-Drying Topcoat right on top of it. Now you may well ask, why not Seche Vite? Indeed I could have used Seche Vite but chose Poshe because it goes on just a little bit thinner. Layer of Susie, layer of Poshe. Another layer of Susie and another layer of Poshe.
And it worked. Hallelujah. Perfect? No. But passable, especially compared to previous efforts.
 |
| Julep Susie |
 |
| Julep Susie |
 |
| Julep Susie |
 |
| Julep Susie |
 |
| Julep Susie |
Lesson learned: if you've got a pastel or any polish that's giving you application trouble, top each layer with a coat of fast dry topcoat. I'd heard about this technique before, and it really does work.
If you're keeping track (and why wouldn't you be?), counting the failed manicures that led up to it that's twelve polish coats' worth of labor right there in those photos. All for a pillow where Green Thumb of Doom could lay it's shimmery green head. Was it worth it? Let's see....
 |
| CrowsToes Green Thumb of Doom, bottle shot |
 |
| CrowsToes Green Thumb of Doom, on the nail (over Julep Susie) and in the bottle |
 |
| CrowsToes Green Thumb of Doom over Julep Susie |
 |
| CrowsToes Green Thumb of Doom over Julep Susie |
 |
| CrowsToes Green Thumb of Doom over Julep Susie |
 |
| CrowsToes Green Thumb of Doom over Julep Susie |
 |
| CrowsToes Green Thumb of Doom over Julep Susie |
 |
| LOVE! |
 |
| CrowsToes Green Thumb of Doom over Julep Susie |
 |
| CrowsToes Green Thumb of Doom over Julep Susie |
 |
| CrowsToes Green Thumb of Doom over Julep Susie |
 |
| CrowsToes Green Thumb of Doom over Julep Susie |
 |
| CrowsToes Green Thumb of Doom over Julep Susie |
 |
| CrowsToes Green Thumb of Doom over Julep Susie |
 |
| CrowsToes Green Thumb of Doom over Julep Susie |
 |
| CrowsToes Green Thumb of Doom over Julep Susie |
 |
| CrowsToes Green Thumb of Doom over Julep Susie |
 |
| CrowsToes Green Thumb of Doom over Julep Susie |
Yes! Yes! Yes! Way worth it, wow, big love for this polish. Those microflakies are fab-u-lous. They make Green Thumb of Doom look like a glass fleck, no? Such a fresh free-spirited green, fit for a leafy little faerie princess... like YOU!
Don't worry, Eleanor, I wouldn't subject you to the Julep. I'll find some less problematic underwear for Green Thumb of Doom. Mojito Madness by Essie, or Josie by Zoya. I'm putting both of them on my "Wanna" list, and when I get 'em I'm coming up to decorate your wiggly mitts with Green Thumb of Doom.
Sounds like a plan, eh? Bet on it!
love,
Aunt Liz
No comments:
Post a Comment